Anyone Can Climb Face,
Construction
Print off a copy of the plans from the index page. This will give you all the dimensions and timber requirements before heading off to buy the gear.I bought treated pine to build the crack. The dimensions on the plans are a little different to what was available at the hardware shop, but it is close enough. Carpentry was never an exact science in my books.
I made up a work bench out of trestles and a bit of board. It worked out pretty well and wasn't very expensive. Just get two saw horses or trestles and a couple of joists about the length required for the bench. Screw the joists onto the sides of the trestles and then screw or nail the bench onto the base. Easy, and sturdy. The trestles I used have fold down legs, so it can be stored flat.
And now the building begins, but remember "Measure twice, cut once":
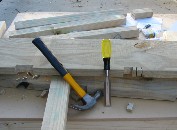
- Lay out all the timber and tools before starting anything, just to see what you have now, and
what it might turn into.
-
The slots in the planks must be exactly matching so that they will sit into the cross beams. Screw or nail the planks together to keep them identical, then secure them in a vice or clamp and cut out the slots using a circular saw with the cut depth set to 20mm. 
- Cut the plank slots to fit the width of the cross beams, with additional cuts about 15-20mm apart to make the chiseling easier.
Once all the cuts are made the planks can be separated.
-
To chisel out the slots, start by making a slight cut along the slot on one side of the plank. This will stop the wood from splitting when you chisel from the other side. Now turn the plank over and knock out the bits of wood between the cuts using a wide chisel. I found that tapping the wood softly made it more difficult and messy, whereas if you really hit the chisel quite hard, the slots came out quickly and cleanly. - With all the slots chiseled out, the crack can be assembled upside down to mark the positions of the crossbeams on the
post. Again, it is fairly critical to be exact, as the thing wont fit together if not. Use a square to mark the positions
on the post.
-
Once the post is marked, assemble the crack with the post on the bottom. Put the planks in position, but have them about 30-40cm apart, so that you still have access to the post and crossbeams. By doing it this way you can be sure that the planks will fit onto the beams once they are secured to the post. 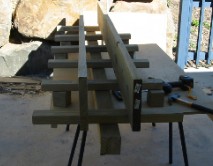
- Secure each of the beams to the post using 3 x 100mm screws per beam. Drill before screwing to ensure the beams
don't split. Also, don't put screws too close to the edge of the beam.
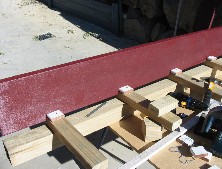
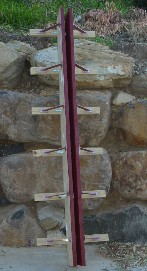
- Once the cross beams are secured, the crack really is starting to take shape. You can
even stand it up against a wall and put the planks on to see what it is all about. If you are like me, this
will be the first time anyone else will get what you are doing. Before that it was always "Well
that is not going to be very difficult. You could just climb up those bits of wood like a
ladder!"
-
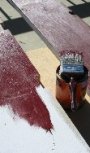
Depending on the type of wood you use for the plank, you may have to paint them. I painted the planks using low sheen acrylic paint with a sprinkling of beach sand for coarseness. When choosing the paint, get the hardest drying and lowest sheen available. I put on 3 coats, with sand in two of them. It is obviously not rock, but sort of close to it. I had the steel brackets made up at work out of 4mm flat bar. If you don't have access to a welder, and as it was in my case, someone who can actually weld (thanks Shirl), check out a hardware shop. They should have off-the-shelf brackets that will suit. I think they are about $10 to $15 each, so if you have to buy them all it is going to get a bit expensive. Make them at work....on someone else's time. The best way to go. 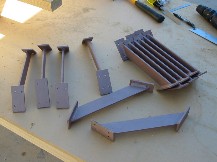
-
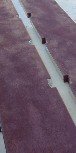
Once the paint is dry you can start putting the crack together. Determine how wide the crack is going to be, depending on your hand size or what type if crack it is, between fingers and fist. My hand sized crack is about 46mm wide. Cut 6 spacers of the required width and screw them to the middle of each of the cross beams. - One of the planks can be put into position now. Use a square to make sure it is at 90° to the beams, then screw the bracket onto the crossbeam and plank... 1/2 a crack in no time. Repeat with the other plank and that is about all you need to do to have your very own crack at home.
One thing you could possibly change is not use treated pine. It just seems a bit too soft. Even when the crossbeams where fully screwed down to the post, there was a little bit of movement if you applied some force to the beams. I would say hard wood is the way to go, it is just heavy.


